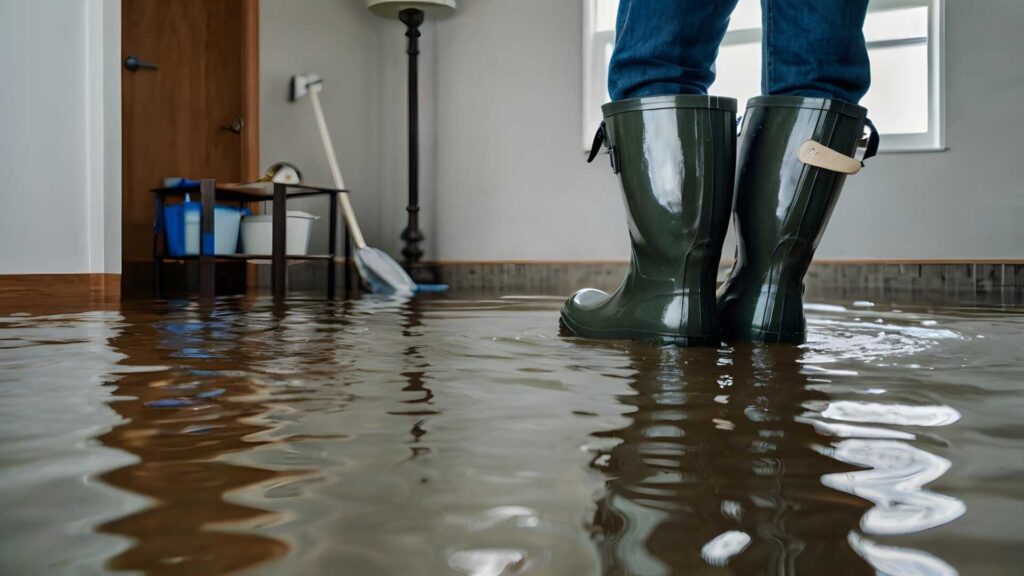
If you’ve ever faced the aftermath of water damage in your home, you know the stress and potential high cost of restoration. However, there are affordable techniques that can effectively mitigate damage without draining your wallet. From using portable extractors that swiftly remove water to employing cost-effective dehumidifiers that prevent mold growth, these methods are both accessible and efficient. Have you ever considered the strategic placement of air movers or the benefits of DIY moisture detection tools? Let’s explore how these simple yet powerful strategies can make a significant difference in managing water damage restoration. What’s your experience with these techniques?
Key Takeaways
- Use portable extractors to quickly remove water and expedite drying, preventing costly mold and damage.
- Position air movers strategically at 45-degree angles every 10-16 feet along walls to enhance drying without extra equipment.
- Rent dehumidifiers instead of purchasing to manage indoor moisture effectively at a lower cost.
- Employ DIY moisture detection with affordable moisture meters and thermal imaging cameras to identify problem areas.
- Implement simplified sewage sanitization using strong, budget-friendly disinfectants and ensure thorough drying with fans and dehumidifiers.
Utilizing Portable Extractors
When tackling water damage, employing portable extractors can greatly expedite the drying process. These powerful tools are essential for efficiently removing water and moisture from your carpets and flooring.
As you immerse yourself in restoration, you’ll find that the speed and effectiveness of a portable extractor are unmatched. They provide significant time savings and reduce the potential for mold growth and further damage.
Understanding the benefits of portable extractors can make a big difference in your water restoration efforts. These devices are effective at pulling out standing water and adept at extracting water from padding and upholstery.
This versatility ensures that you can address various affected areas quickly and effectively. Additionally, the mobility of portable extractors allows for easy maneuvering around tight spaces, making them ideal for residential and small commercial settings.
To keep your extractor in top shape, follow these extractor maintenance tips. Regularly check and clean the filters to prevent clogging and maintain suction power.
After each use, flush the system to remove any residue or debris, which helps prevent odor and deterioration. Additionally, inspect the hoses and connections for any signs of wear and tear to avoid leaks and confirm that the machine operates efficiently.
Efficient Air Mover Usage
Efficient air mover usage greatly enhances the drying process in water damage restoration. You’ve already tackled the initial clean-up with your portable extractor, and now it’s time to focus on drying out your space effectively. Positioning your air movers strategically is key to achieving ideal airflow, ensuring that every damp nook receives attention.
First, think about the layout of the affected area. Your goal is to create a continuous flow of air, and this starts with smart equipment placement. Don’t just randomly scatter air-movers around. Place them at 45-degree angles to the walls to push air along the surfaces where water tends to accumulate. This method helps cover a broader area and prevents moisture pockets from escaping treatment.
Next, consider the number of air movers you’ll need. Generally, one air mover for every 10 to 16 feet of wall space is recommended. However, this can vary depending on the specifics of the room and the extent of the water damage. You’re part of a community that values doing things right, so take the time to evaluate your space thoroughly.
Airflow enhancement is about placement and quantity and also about coordination with other restoration steps you’re taking. Make sure your air movers aren’t working against any other equipment. Each unit should complement the others, forming a unified front against moisture.
Dehumidification on a Budget
After setting up your air movers for ideal drying, it’s important to address humidity levels to prevent mold growth and further damage. The key here is dehumidification, and luckily, there are cost-effective solutions that won’t break the bank.
First off, consider budget-friendly equipment like portable dehumidifiers. These units can be quite effective and don’t require a large investment. Look for models that suit the size of your space—using a dehumidifier that’s too small can be as ineffective as not using one at all. Remember, it’s about finding the right balance between performance and price.
Secondly, think about where you place these dehumidifiers. Position them strategically around the wet areas but away from the walls and furniture to maximize air circulation. This placement helps pull moisture from the air more efficiently, speeding up the drying process.
Additionally, don’t overlook the maintenance of your dehumidifiers. Regularly emptying the collected water and cleaning the filters ensures they operate at peak efficiency, which is essential for keeping costs down and maximizing effectiveness.
If purchasing a new dehumidifier isn’t an option right now, consider renting. Many hardware stores offer rental services for budget-friendly equipment. This can be a great way to access high-quality tools at a fraction of the cost.
Lastly, join online communities or local groups focused on home maintenance. They’re often a treasure trove of tips and tricks, shared by people who’ve been in your shoes, making you feel supported and part of a community looking to reclaim their homes from water damage smartly and economically.
DIY Moisture Detection Techniques
Detecting moisture in your home is essential to preventing further water damage and mold growth. You’re not alone in dealing with this issue, and thankfully, there are tools and techniques that can help you identify problem areas effectively. Let’s explore two powerful methods: using moisture meters and thermal imaging.
Moisture meters are your first line of defense. They come in two types: pin-type and pinless. Pin-type meters measure moisture content at various depths by penetrating the material with two pins. This is particularly useful for checking underneath surfaces. Pinless meters, on the other hand, use electromagnetic sensors to read moisture levels without causing any damage. They are great for scanning larger areas quickly.
Thermal imaging cameras visualize heat, which can indicate moisture since evaporating water cools surfaces. This method allows you to see the bigger picture and detect moisture behind walls or under floors without any invasive techniques.
Here’s a quick guide on when to use each tool:
| Tool | Best For | Advantages |
|---|---|---|
| Moisture Meters | Detailed assessments | Accurate, provide exact figures |
| Thermal Imaging | Initial inspections | Non-invasive, covers large areas |
Remember, combining these tools can provide a more thorough moisture assessment. Start with thermal imaging to scope out potential issues, then use a moisture meter to get precise moisture content readings. This approach ensures you’re not missing any hidden damp spots that could lead to significant damage or health issues.
You’re now equipped to tackle moisture detection in your home like a pro. Keep this guide handy and take control of your living environment.
Simplified Sewage Sanitization
Dealing with water damage often leads to the intimidating task of sewage sanitization. You’re not alone in this; many face the same challenge, and there are straightforward steps you can take to ensure your home is safe and clean.
First, gear up appropriately with protective clothing, gloves, and masks. Safety is paramount when dealing with potential contaminants.
Start by removing any solid waste carefully. This is the first step in effective sewage treatment. Verify that you dispose of this waste properly, according to your local sanitation protocols. Remember, proper disposal is essential to prevent further contamination or harm to the environment.
Next, focus on drying out the affected area. Use fans, dehumidifiers, and natural ventilation to help reduce moisture quickly. This step is important as it halts the growth of mold and mildew, which are common post-flooding concerns that can impact your health.
Once the area is dry, clean all surfaces with a strong disinfectant. Choose products specifically designed for sewage cleanup. These products are more effective at eliminating sewage-borne bacteria and viruses. Confirm you follow the manufacturer’s instructions to maximize the effectiveness of the disinfectant.
Lastly, verify the area is sanitized by checking no lingering odors or visible waste remains. Sometimes, you might need to repeat the cleaning process to achieve thorough sanitation.
Summary
Now, imagine your home swiftly returning to its pre-flood glory. With a portable extractor in hand, you effortlessly suck up every last drop of moisture. Strategically angled air movers whirl, creating a crisp, dry breeze. A handy dehumidifier hums quietly in the corner, guarding against mold. Your own moisture meter ticks as you pinpoint damp spots, and you wield strong disinfectants to cleanse and secure your space. You’ve mastered affordable water damage restoration efficiently and effectively.