Did you know that water damage can greatly increase your home’s humidity levels, leading to hidden costs down the line? By tackling the issue early with budget-friendly strategies, you can avoid more severe and expensive repairs. Start by quickly identifying and sealing any leaks; this simple step can save you a fortune in potential damages. But what if the damage has already set in? Several cost-effective ways remain to restore your home without draining your wallet. Let’s explore how you can manage this with everyday items you probably already have and some smart prioritization techniques. What might be the most effective method for your situation?
Key Takeaways
- Quickly identify and seal leaks using household tools to prevent escalating repair costs.
- Enhance drying by opening windows and using fans to minimize mold development and structural harm.
- Clean affected areas with homemade solutions like vinegar and baking soda to avoid expensive cleaners.
- Prioritize repairs on structural and plumbing systems to ensure safety and prevent future expenses.
- Reuse and recycle materials such as furniture and fixtures to reduce replacement costs.
Identify and Seal Leaks Quickly
When you spot a leak, it’s vital to act fast to prevent further water damage. The first step in your leak detection process involves identifying the source. You’ll feel more in control once you know exactly where the problem lies. Start with visible pipes, under sinks, and around your bathroom fixtures. Sometimes, it’s as simple as noticing a damp spot on a wall or ceiling.
Once you’ve located the leak, evaluating the severity is fundamental. Not all leaks require professional help right away, and knowing this can save you money. For minor drips, you might merely need to tighten a connection or replace a washer. These are tasks you can do yourself, bringing a sense of accomplishment and fostering a connection with your home.
For more significant issues, such as those hidden within walls or floors, it’s time to talk about waterproofing methods. These aren’t merely quick fixes; they’re long-term solutions that ensure the safety and integrity of your living space. Sealants and epoxy injections are popular choices, effectively blocking moisture penetration.
If you’re unsure about applying these yourself, don’t hesitate to reach out to a professional. Remember, involving experts early can prevent the escalation of damage, keeping your repair costs manageable.
Being part of a community means looking out for each other. Share your experiences and solutions on neighborhood platforms. This way, you’re fixing your home and helping others avoid similar issues, strengthening your community bonds.
Utilize Efficient Drying Techniques
After sealing leaks, the next critical step is to dry out the affected areas thoroughly. Efficient drying isn’t merely about quick fixes; it’s about ensuring your home regains its comfort and safety without breaking the bank.
Here’s how you can take control of the situation and foster a sense of recovery and resilience among your household members.
First, understand that proper air circulation is paramount. It accelerates the drying process and helps in maintaining an environment less hospitable to mold and mildew.
Here are several practical steps you can take:
-
Increase Air Flow: Open windows and doors to create cross-ventilation. This helps reduce the moisture levels indoors.
-
Use Fans: Position fans strategically to promote air circulation throughout the home. If the humidity outside is lower than inside, place a fan facing out of a window to push humid air out.
-
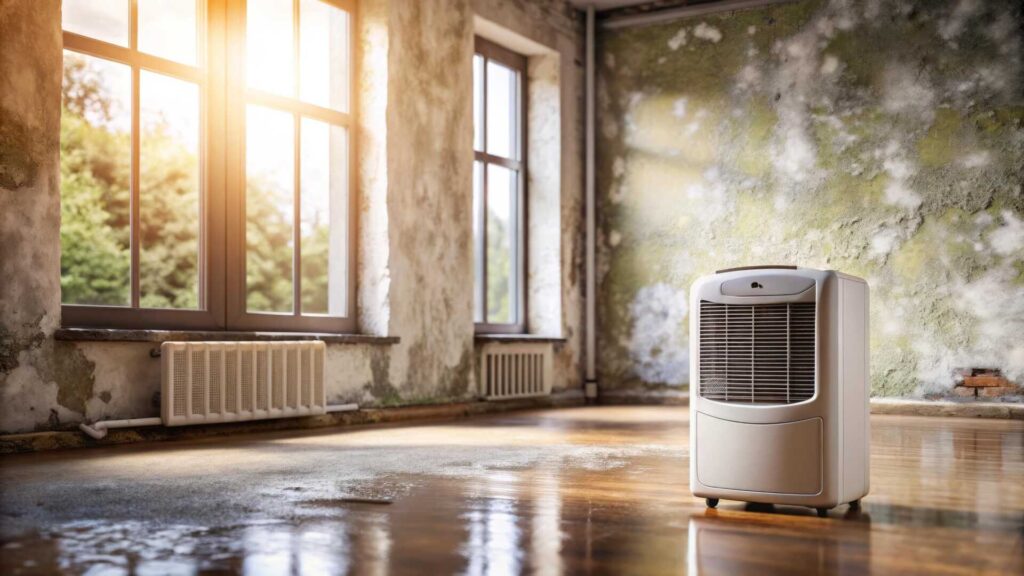
Utilize Dehumidifiers: These are excellent for moisture control, especially in areas with minimal airflow. They help pull moisture out of the air, which greatly speeds up the drying process.
-
Move Furniture Around: Shifting furniture and rugs away from wet walls or floors can prevent additional absorption and promote better airflow around damp areas.
-
Elevate Wet Items: Elevating wet upholstery and cushions allows air to circulate around them, speeding up the drying time.
Clean With Homemade Solutions
Once your home is dry, you’ll want to tackle any lingering odors and stains with effective homemade cleaning solutions. Using items you likely already have in your pantry, such as vinegar and baking soda, you can create powerful, non-toxic cleaners that won’t break the bank. It’s not only about saving money; it’s about creating a safe, clean environment for you and your loved ones.
Vinegar, a versatile liquid, is excellent for dealing with mold and mildew. A simple vinegar solution can be sprayed directly onto affected areas, helping to break down and remove mold spores. On the other hand, baking soda is great for absorbing odors and can also be used as a gentle abrasive for scrubbing away stubborn stains.
Here’s a handy guide to mixing your own cleaning solutions:
| Ingredient | Purpose | How to Use |
|---|---|---|
| Vinegar | Mold removal | Spray on, leave for an hour, rinse |
| Baking Soda | Odor removal | Sprinkle on, leave overnight, vacuum |
| Combination | Deep cleaning | Make a paste, apply, scrub, rinse |
Prioritize Areas to Restore
Having tackled the cleaning with your homemade solutions, it’s important to focus on which areas of your home need restoration first.
Since time and resources are limited, evaluating damage and prioritizing tasks can make a significant difference in efficiently restoring your space to its former glory.
When you’re ready to evaluate the damage, start by creating a checklist. This list will keep you organized and ensure that you address the most critical areas first.
Here’s how you can prioritize:
-
Structural Integrity: Check for any compromised parts of your home’s structure. This includes foundations, beams, and load-bearing walls. Safety is paramount, so address these issues first.
-
Electrical Systems: Water and electricity are a hazardous mix. Inspect your electrical system for any damage to prevent potential hazards.
-
Plumbing: Confirm that all plumbing issues are fixed to prevent further water damage and restore functionality to your home.
-
Flooring and Carpets: These areas tend to absorb a lot of water and can lead to mold if not addressed quickly.
-
Walls and Ceilings: Look for signs of water damage like stains or bulging, which could indicate a deeper issue.
Reuse and Recycle Materials
As you tackle the restoration, consider reusing and recycling materials to save costs and reduce waste. When you’re evaluating the damage, look for opportunities to salvage what you can. This approach aids your budget and minimizes environmental impact.
Start with fixtures. Many fixtures can be thoroughly cleaned and restored rather than replaced. This includes things like light fixtures, knobs, and handles that might have survived water exposure. Upcycling furniture is another great way to reduce costs. A water-stained table can be sanded down and refinished or repainted for a fresh, new look. This is cost-effective and adds a personal touch to your home’s restoration.
Here’s a simple guide to help you decide what to reuse or recycle:
| Material | Reuse/Recycle Strategy |
|---|---|
| Wood | Sand and refinish or repaint |
| Metal | Clean, polish, or repaint |
| Glass | Clean and reuse if not broken |
| Plastics | Clean thoroughly or repurpose |
Involving yourself in salvaging fixtures and upcycling furniture creates a sense of community and belonging, as you’re contributing to a sustainable practice that many in your community value. Reach out to local restoration groups or online forums for tips and support. They can offer advice and may even provide resources that can help you in your restoration efforts.
Review
You might worry that budget-friendly means cutting corners, but it’s quite the opposite. By sealing leaks promptly, using simple DIY cleaning solutions, and employing smart drying methods, you’re preventing bigger issues down the line. Picture your home, restored but enhanced by creatively reusing materials and fixtures. This approach isn’t solely about saving money—it’s about making sustainable, effective decisions that ensure your home remains safe and inviting for years to come.

