Did you know that a wet/dry vacuum can be your first line of defense when facing a home water extraction emergency? You’re not alone in facing such crises, but the way you respond can dramatically change the outcome. Using the right equipment quickly and efficiently is essential to mitigate water damage. If you’re curious about how to enhance these efforts with additional tools and techniques, consider how specific strategies can be tailored to your situation. Understanding these can greatly reduce the risk of long-term damage, but there’s more to learn about optimizing this process. How exactly do these techniques work together to safeguard your home?
Key Takeaways
- Use wet/dry vacuums specifically designed for water removal to efficiently extract liquids and solids.
- Deploy large, commercial-grade dehumidifiers in saturated areas to speed up the drying process.
- Open windows and doors to enhance air circulation and facilitate natural drying.
- Position fans strategically to create cross-breezes and improve air movement throughout the space.
- Regularly clean and empty vacuum canisters to prevent mold growth and maintain hygiene during extraction.
Assessing Water Damage Quickly
Why wait when immediate action is vital? In the aftermath of water intrusion, conducting a quick inspection and water damage assessment is paramount to mitigate further loss. You’re not merely protecting your property; you’re safeguarding your community of cherished memories and investments.
Start by visually scanning the affected areas. Identify signs of water penetration and moisture absorption in walls, ceilings, and floors. Use moisture meters to quantify the extent of saturation. These instruments are essential as they provide precise readings that guide your next steps in the drying process.
Document everything meticulously. Take photographs and make notes about the damage. This documentation is useful for insurance claims and helps track the drying process’s progress. Mapping out the moisture will allow you to see the most critical areas and prioritize effectively.
Focus on categorizing the water damage. Classify it based on the water source and the level of contaminants involved. This classification will determine the safety measures to be taken and the urgency of remediation efforts. Remember, clean water from rain or leaky pipes poses less risk than water from sources like sewage backups.
Lastly, don’t underestimate the power of a professional assessment. While your initial inspection is essential, a certified water damage restoration expert brings in-depth knowledge and specialized tools that ensure nothing is overlooked. They’re part of your community, too, ready to help restore your home and your peace of mind.
Taking these steps emphasizes your role in a responsible community and sets the foundation for effective water damage restoration. Act swiftly, act smartly.
Safety First: Electrical Considerations
Before you start extracting water from your home, turn off the power safely at the main breaker to ensure your safety.
Avoid handling or attempting to operate any waterlogged appliances, as they pose a significant risk of electrical shock.
Instead, use battery-powered tools to manage water extraction tasks, ensuring you remain safe from electrical hazards.
Turn Off Power Safely
When faced with a home emergency that involves water, your first step should be to safely turn off the power to prevent electrical hazards. This vital measure in emergency preparedness assures that you, your family, and emergency responders are exposed to the risks of electrocution—a common and serious threat in water-involved incidents.
To proceed, locate your home’s main electrical panel—typically found in the basement, garage, or outdoors. Always use a dry, wooden, or rubber-insulated tool to switch off the main circuit breaker. This action cuts power to your entire household, markedly reducing the risk of electrical accidents.
Remember, it’s not only about flipping a switch; it’s about ensuring everyone’s safety.
After disabling the main power, assess the situation. If you can do so without stepping into the water, check that the individual circuit breakers are also turned off. This double-check assures that no residual electricity lingers.
It’s a part of power safety that’s often overlooked but is critical in maintaining a secure environment.
Avoid Waterlogged Appliances
After confirming your home’s power is completely turned off, it’s crucial to avoid handling waterlogged appliances. Water and electricity form a dangerous combination, and the risks are considerably high with appliances that have been exposed to water.
Here’s how you can manage these risks effectively and ensure the safety of your household.
-
Inspect Visibly: Before any attempt to move or repair, visually inspect appliances for water damage. Look for any signs of moisture or corrosion.
-
Consult Professionals: Always consult with a certified electrician or appliance maintenance expert before trying to restore any waterlogged appliances. This ensures safety and effectiveness.
-
Avoid DIY Repairs: Water damage can affect internal components in ways that aren’t immediately obvious. Avoid the urge to fix appliances yourself.
-
Plan for Longevity: Consider the long-term health of your appliances. Sometimes, replacing is safer and more cost-effective than repairing.
-
Safety Documentation: Keep manuals handy for all appliances. These documents often contain specific safety warnings and instructions related to water exposure.
Use Battery-Powered Tools
As you move forward in addressing water-related emergencies in your home, consider utilizing battery-powered tools for their inherent safety advantages. Using these tools, which aren’t reliant on main electrical power sources, dramatically reduces the risk of electric shock in wet conditions. This is vital, especially when water levels rise unexpectedly.
Battery-powered tools excel in efficiency and portability. You’re not tethered by cords, granting you the flexibility to maneuver around flooded areas more effectively. However, it’s important to maintain these tools diligently. Regular battery maintenance ensures that they’re always ready at a moment’s notice. This involves routine checks for battery life and confirming they’re fully charged and stored in a dry, cool place.
To maximize tool efficiency, select equipment designed specifically for emergency scenarios. These include submersible pumps, wet-dry vacuums, and heavy-duty fans. Each tool should be chosen based on its utility and endurance in harsh environments.
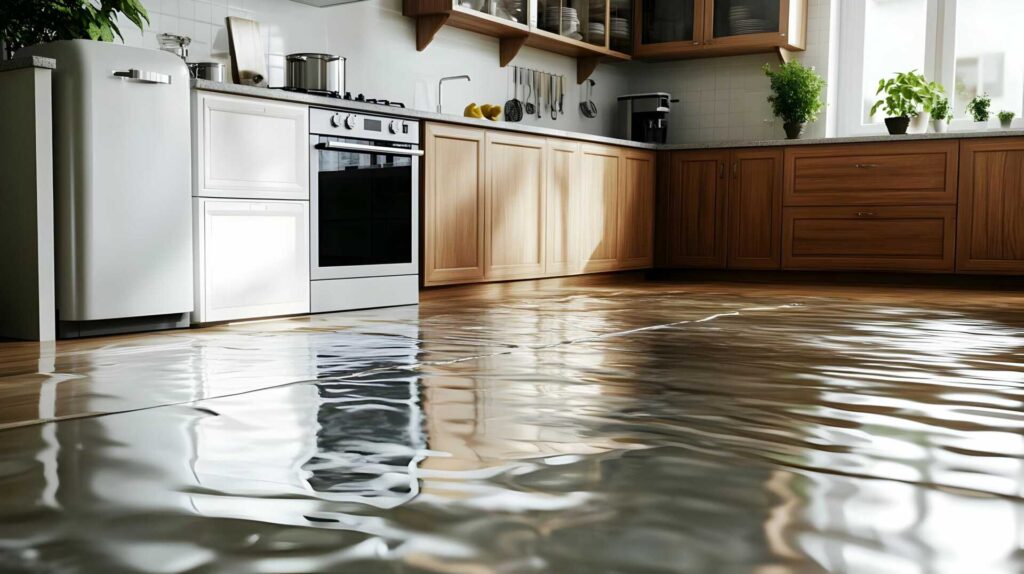
Water Removal Using Wet/Dry Vacuums
Efficiency is key when you’re faced with the challenging task of removing water from your home after a flood or leak. Utilizing a wet/dry vacuum can be one of the most effective methods at your disposal. This versatile tool helps you clear out water quickly and ensures a cleaner and safer environment as you recover from water damage.
Wet/dry vacuums are particularly beneficial because they’re designed to handle both damp and dry materials, making them incredibly useful in emergencies.
Here’s how you can maximize their benefits:
-
Verify the vacuum is suited for water removal: Check that your model is designed to handle liquids. This functionality is vital for efficient water extraction.
-
Regularly clean and maintain your vacuum: Keeping your vacuum in top condition enhances its longevity and effectiveness. Here are a few vacuum maintenance tips:
-
Empty the canister after each use to prevent mold growth.
-
Check and clean filters regularly to maintain suction power.
-
Inspect the hose and attachments for any blockages or damage.
-
Store the vacuum in a dry, clean place to avoid unnecessary wear.
-
Lubricate moving parts if necessary, depending on the manufacturer’s instructions.
Dehumidification Techniques
While removing standing water is a vital step, managing humidity levels through dehumidification is equally important to prevent further damage and mold growth. As you navigate this challenging situation, understanding the right dehumidification techniques can make a significant difference in safeguarding your home.
Firstly, selecting the appropriate dehumidifier is essential. For large areas or highly saturated spaces, you’ll need a commercial-grade dehumidifier capable of handling high moisture levels efficiently. Pay close attention to dehumidifier settings; these should be adjusted based on the specific humidity levels and the size of the area. A hygrometer can be invaluable here, helping you monitor the room’s humidity precisely.
Placement of the dehumidifier also plays a pivotal role. Position the unit in the center of the room or, if dealing with specific damp patches, closer to these areas. Make sure the space is as sealed as possible—close all windows and doors to create an effective moisture barrier. This containment helps maximize the dehumidifier’s efficiency, pulling in moist air and expelling dry air, stabilizing the environment more rapidly.
Moreover, integrating moisture barriers into your strategy can be effective, especially in preventing moisture from seeping into other areas or structural parts of your home. These barriers, typically made from polyethylene plastic or similar materials, cover floors and walls, thereby protecting against moisture ingress.
Natural Drying Strategies
After implementing dehumidification techniques to control indoor humidity, you can further enhance the drying process using natural strategies.
Embracing natural drying methods complements your mechanical efforts and helps maintain a healthier living environment through improved air circulation and moisture control.
Let’s explore how you can efficiently integrate these strategies into your routine.
Firstly, maximizing natural airflow is essential. You should:
-
Open Windows and Doors: Weather permitting, create a cross-breeze by opening windows and doors across the home. This increases air circulation, greatly speeding up the drying process.Use Ceiling Fans: Activate ceiling fans to promote air movement in the house. Confirm they rotate counterclockwise during summer months for the best airflow.
-
Rearrange Furniture: Move furniture away from walls and give wet areas maximum exposure to circulating air.
-
Leverage Sunlight: Allow sunlight to enter through windows, as it naturally assists in drying and acts as a mild disinfectant.
-
Control Indoor Temperature: Maintain a warmer indoor temperature if possible, as warmer air holds more moisture and, when circulated out, can dry the interior spaces more effectively.
Sanitizing After Water Extraction
Once you’ve completed the water extraction process, it’s important to sanitize the affected areas to prevent mold growth and eliminate bacteria.
Sanitizing addresses immediate cleanliness and ensures long-term mold prevention, which is essential for maintaining a healthy living environment.
Start by evaluating all surfaces that were in contact with water. You’ll want to focus on porous materials such as wood, drywall, and fabrics, which are more susceptible to mold. Non-porous surfaces like plastic, metal, and glass require different cleaning solutions and techniques.
For effective surface sanitization, use a solution of one cup of household bleach mixed with one gallon of water. Apply this solution generously using a spray bottle or a sponge, making sure to cover thoroughly.
It’s imperative to wear protective gloves and a mask during this process to avoid inhaling fumes or coming into direct contact with the bleach.
Allow the bleach solution to sit on the surfaces for at least 10 minutes before wiping down with clean water. This dwell time is necessary to kill all present bacteria and fungi effectively.
For larger areas or if you’re dealing with significant water damage, consider using a commercial-grade disinfectant designed for flood cleanup. These products often provide stronger mold prevention and are formulated to tackle a broad spectrum of microorganisms.
Lastly, ventilate the area well after sanitization. Open windows or use fans to help speed up the drying process and disperse any chemical vapors.
Proper ventilation is important for drying and maintaining air quality in your home post-cleanup.
Preventing Future Water Damage
To effectively prevent future water damage in your home, it’s critical to implement proactive measures and maintain regular inspections of key areas.
Being proactive is more than just about fixing what’s broken; it’s about preventing issues before they arise, ensuring that you’re always one step ahead in safeguarding your property.
You’ll find that integrating both waterproofing measures and drainage solutions plays a pivotal role in your defensive strategy against water damage.
Here are some specific steps you can take:
-
Regularly Clean Gutters and Downspouts: Make sure these are free of debris to prevent blockages that can cause water to overflow and seep into your home.
-
Inspect and Repair Your Roof: Small leaks can quickly become big problems. Regular inspections and timely repairs keep water out.
-
Install Water Sensors: Place these in potential flood zones like basements, near washing machines, and under sinks to detect water early and mitigate damage.
-
Apply Waterproof Sealants: Use these in your basement, on your deck, and around windows and doors to provide an additional layer of protection against water intrusion.
-
Enhance Landscape Drainage: Adjust your landscaping to encourage water to flow away from your home, not towards it.
Summary
Swiftly evaluating and addressing water damage with the right tools, such as wet/dry vacuums, is essential. Balance this technical prowess with natural drying strategies and vigilant sanitization to safeguard your home. While the immediacy of extraction battles against water’s destructive march, preventive measures fortify your defenses for the future. Remember, the interplay of rapid response and thorough, ongoing maintenance ensures your sanctuary remains both resilient and restored, keeping disaster at bay.