Like Hercules facing the Hydra, you too must tackle the intimidating task of mold remediation after a flood, a battle where cutting off one head might seem to prompt the growth of two more. You’ll start by removing standing water and employing dehumidifiers to strip away moisture, the lifeblood of mold. But what are the next steps to confirm you’re truly getting to the root of the problem and not merely addressing the surface issues? Confirming thoroughness in this phase could mean the difference between temporary relief and long-term solutions. What strategies will ensure that the mold won’t return?
Key Takeaways
- Immediately remove standing water using high-power drying tools and monitor humidity to prevent mold growth.
- Seal off affected areas with plastic sheeting and use negative air machines to contain mold spores.
- Thoroughly dry and dehumidify the environment, integrating heat treatment and high-velocity fans to eliminate hidden moisture.
- Clean and disinfect all surfaces rigorously with EPA-approved fungicidal sprays, ensuring complete removal of mold.
- Repair structural damage with licensed contractors and use mold-resistant materials to prevent future mold issues.
Assessing Mold Extent
How do you determine the extent of mold damage after a flood? It’s vital to understand that mold can be more than merely a superficial nuisance; it may penetrate deep into your home’s structure.
To start, you’ll need to employ precise mold identification techniques. These include visual inspections and the use of moisture meters to detect dampness hidden within walls, floors, and ceilings—common areas where mold thrives.
Recognize that mold growth factors heavily influence the assessment. Mold requires moisture, a food source such as wood or drywall, and adequate temperatures to flourish. Post-flooding, these conditions are typically met, making your home a potential hotspot for mold proliferation.
Begin your evaluation by checking areas most prone to water accumulation and retention. Don’t overlook less obvious spaces such as behind wallpaper, in ventilation systems, and around window sills.
Mapping the extent of contamination is essential. This involves more than spotting visible mold; it includes anticipating where mold may have spread unseen. If you find mold on drywall, it’s likely that the infestation extends deeper into less accessible areas.
This step isn’t only about cleaning what you see but planning remediation for what you don’t.
Finally, engage with professionals who specialize in environmental testing. They can provide detailed analyses, such as air quality assessments and infrared scans, to ensure no mold is left undetected.
Safety Precautions
Before diving into mold remediation, it’s essential you prioritize safety to prevent health risks and further damage. Dealing with mold exposure can lead to serious health issues, especially if you’re not adequately protected. Consequently, understanding and implementing the right safety measures is imperative.
Here’s how you can ensure your safety and that of those around you:
- Wear Protective Gear: Always wear appropriate protective gear before entering the affected area. This includes N-95 respirators to protect your lungs from inhaling mold spores, gloves to prevent direct contact with mold, and goggles to shield your eyes.
Protective clothing that covers your entire body should also be worn to avoid any skin contact with contaminants.
- Ensure Good Ventilation: Enhancing air quality in the remediation area is critical. Use fans and open windows to circulate air and reduce mold spore concentration indoors.
However, make sure that this doesn’t spread mold to unaffected areas.
- Use Proper Filtration Devices: Employ air purifiers with HEPA filters in the work area to capture fine particulates, including mold spores.
These devices help maintain cleaner air, reducing the risk of inhalation and further spread of mold.
- Segregate the Work Area: Isolate the affected area to prevent the dispersal of mold spores to other parts of your home.
Use plastic sheeting to seal off doorways and vents. This containment is essential to maintaining overall air quality and ensuring that remediation efforts are localized and effective.
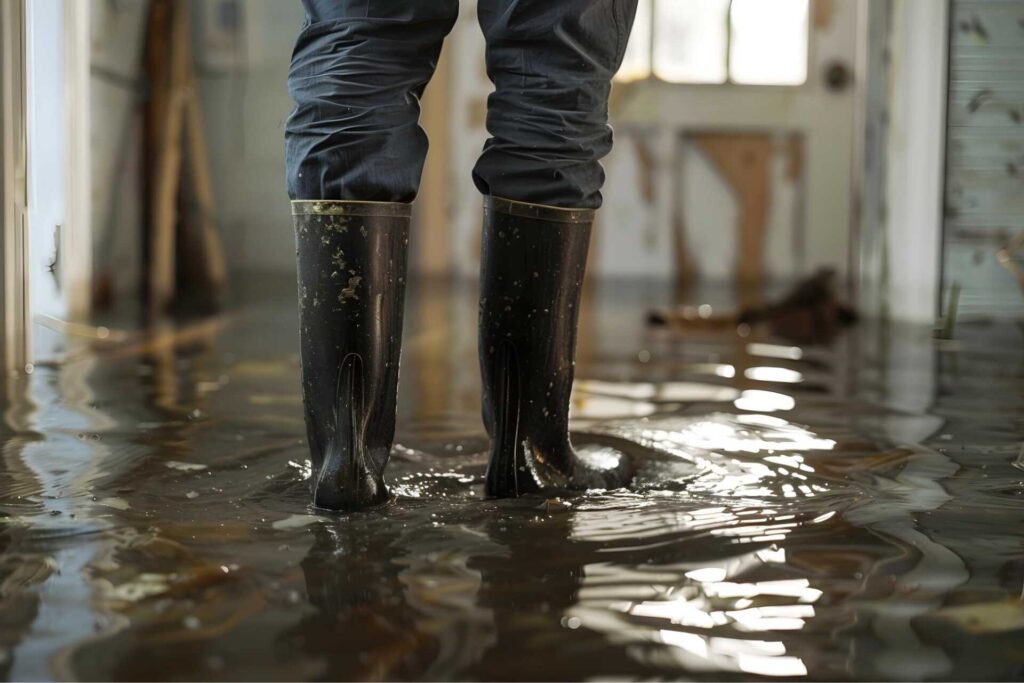
Immediate Water Removal
You must assess water damage quickly to determine the scope and urgency of the removal process.
Utilize high-power drying tools immediately to expedite the drying of affected areas and prevent mold growth.
Continuously monitor humidity levels to ensure they remain at a safe threshold, safeguarding your property from further damage.
Assess Water Damage Quickly
When facing water damage after a flood, it’s important to assess the extent swiftly to mitigate further damage. Acting quickly can help you feel more in control and less overwhelmed by the situation. Here’s how you can start:
-
Identify the Water Source: Determine where the water is coming from to avoid further influx. Is it from river overflow, rain penetration, or burst pipes? Correctly identifying the source is key for effective remediation.
-
Document the Damage: Before you start cleaning up, take photos or videos to document the extent of the water damage. This visual evidence is significant for insurance claims and can help in the recovery process.
-
Review Your Insurance Coverage: Check your policy details to understand what types of water damage are covered. This step is important to ensure you know your entitlements and the process for filing a claim.
-
Contact Professionals: Reach out to water damage restoration experts who can assess the damage more thoroughly. They can offer specific advice and services tailored to your situation, ensuring a more efficient recovery process.
Utilize High-Power Drying Tools
After evaluating water damage, it’s crucial to start the drying process immediately using high-power drying tools. The quicker you tackle the moisture, the less opportunity mold has to root itself in your home.
Industrial dryers and air movers are your best allies in this urgent task. These powerful devices work by circulating large volumes of air at high speeds, greatly speeding up the evaporation process.
You’ll want to strategically place air movers around the affected area to ensure ideal airflow. Think of them as part of a community working together to restore your space; each unit supports the others, maximizing the drying effect.
Position the industrial dryers in critical areas where water has deeply penetrated surfaces, such as carpets and wall cavities. These tools are designed for heavy-duty use and can dramatically reduce the drying time compared to standard household fans.
Monitor Humidity Levels Continuously
Throughout the drying process, continuously monitoring humidity levels is essential to ensure that your environment remains conducive to thorough drying and mold prevention.
Effective humidity control and moisture monitoring play significant roles in this endeavor. Here’s how you can effectively manage this vital aspect:
-
Use Hygrometers: Invest in reliable digital hygrometers to measure the humidity level in each room. This will help you keep an eye on the most critical areas prone to moisture buildup.
-
Set Humidity Targets: Aim to maintain indoor humidity levels at 30-60%. This range discourages mold growth and supports ideal drying conditions.
-
Regular Checks: Check humidity readings at least twice a day. Afternoon and late evening are key times since humidity fluctuates with daily temperature changes.
-
Respond Quickly: If any area shows humidity levels above your target, act quickly by adjusting your dehumidifiers or increasing air circulation. This rapid response prevents the onset of mold and further damage.
Drying and Dehumidifying
To effectively combat mold after a flood, it is crucial to start by thoroughly drying and dehumidifying the affected areas. You’re tackling the visible dampness and the moisture that seeps into walls, floors, and furniture. This critical step prevents mold from setting in and spreading, which can wreak havoc long after the water recedes.
Integrating heat treatment and enhancing air circulation plays a pivotal role in this process. Heat treatment helps by raising the temperature of the air, which in turn increases its capacity to hold moisture. This is then effectively removed with dehumidifiers. Ensuring good air circulation is equally important; it helps disperse the heat evenly and prevents damp spots where mold could thrive.
Here’s a quick guide to aid you in setting up an effective drying system:
| Step | Equipment Needed | Key Consideration |
|---|---|---|
| Increase Temperature | Portable heaters | Do not overheat; monitor closely |
| Circulate Air | High-velocity fans | Position strategically for optimal airflow |
| Extract Moisture | Dehumidifiers | Empty regularly to maintain efficiency |
| Monitor Progress | Hygrometers | Keep track of humidity levels |
| Adjust as Necessary | Adjust all equipment | Respond to changes in room conditions |
Cleaning and Disinfecting
Having thoroughly dried and dehumidified the area, you’ll next focus on cleaning and disinfecting to confirm all mold spores and bacteria are eradicated. This step is essential to restore your space to a safe, healthy environment.
The following list outlines imperative cleaning techniques and disinfecting solutions to effectively tackle mold residues:
-
Choose Appropriate Cleaning Agents: Opt for EPA-approved fungicidal sprays and solutions specifically designed for mold removal. These products will help ensure that the surfaces are clean and resistant to future mold growth.
-
Use Protective Gear: Always wear gloves, masks, and protective eyewear while cleaning. This prevents inhaling harmful spores or chemicals. Remember, your safety is as important as the cleaning process itself.
-
Thorough Scrubbing: Employ vigorous scrubbing actions with stiff brushes to remove mold from hard surfaces. For porous materials like wood, you might need a more delicate approach, such as using a soft brush or cloth to avoid damage.
-
Apply Disinfecting Solutions: After cleaning, apply a strong disinfecting solution to all surfaces. This step is critical to kill any remaining mold spores and bacteria, confirming that your environment isn’t just visually clean but hygienically safe.
In addressing these steps, you’re not merely cleaning up after a flood; you’re taking proactive measures to ensure your home remains a safe, welcoming space for everyone.
Mold Containment Strategies
After addressing the initial cleanup and disinfection, it is vital to focus on mold containment to prevent spores from spreading to uncontaminated areas. You’re now moving into a significant phase where precision and careful planning matter. Let’s make certain that your efforts to restore your space are as effective as they should be.
Firstly, understand that mold spores are airborne entities that can easily travel through air circulation. As a result, controlling airflow is key. You should use plastic sheeting to seal off the affected area, including doorways and air vents, to minimize the movement of spores. It is also wise to maintain negative air pressure in the containment zone, which helps in keeping airborne mold spores confined to that area.
Here’s a breakdown of tools and techniques that will aid in effective mold containment:
| Equipment/Technique | Purpose | Implementation Tip |
|---|---|---|
| Plastic Sheeting | Barrier | Seal off entry points and vents |
| Negative Air Machines | Use in athe ffected area to maintain negative pressure | Use in affected area to maintain negative pressure |
| HEPA Filters | Trap spores | Install in HVAC systems and air purifiers |
| Proper Ventilation | Reduce humidity | Make certain exhaust fans are functional |
Repairing Structural Damage
Once you’ve managed to contain the mold, it’s vital to assess and repair any structural damage caused by the flooding. Confirming the structural integrity of your home keeps you safe and restores the sense of security and comfort your space provides.
Firstly, conduct a thorough inspection of the property to identify all areas that have sustained damage. Focus particularly on foundational elements, load-bearing walls, and supports. It’s imperative to address these areas promptly to prevent further deterioration.
Here’s a clear plan to help you navigate the complex process of repairing structural damage:
-
Evaluate the Extent of Damage: Hire a professional structural engineer to assess the degree of damage. This step is critical in understanding which areas are compromised and require immediate attention.
-
Choose Appropriate Repair Techniques: Depending on the damage, different repair techniques will be necessary. For minor issues, simple fixes like sealing cracks or replacing damaged wooden supports might suffice. More severe problems may require hydraulic jacks to lift and stabilize the foundation or major carpentry.
-
Implement the Repairs: Collaborate with licensed contractors who specialize in post-flood restoration. Confirm they use quality materials and adhere to local building codes to restore the structural integrity of your home effectively.
-
Regular Monitoring and Maintenance: Once repairs are completed, keep a close eye on the affected areas and conduct regular check-ups to confirm everything remains stable and secure.
Preventing Future Mold Growth
As you plan your home’s recovery from flooding, consider upgrading your ventilation systems to effectively control moisture levels and minimize mold growth.
Additionally, incorporating mold-resistant materials into your repairs can provide a long-term defense against future mold problems.
These strategies enhance the resilience of your property and protect the health of its occupants.
Enhance Ventilation Systems
To prevent future mold growth, enhancing your ventilation systems is vital. Proper ventilation removes damp, stale air and introduces fresh, dry air, essential for maintaining a healthy indoor environment.
Here’s how you can enhance your home’s ventilation to ensure effective mold prevention:
-
Assess Current Ventilation: Start by evaluating the effectiveness of your existing ventilation systems. Identify areas with poor airflow, such as bathrooms, kitchens, and basements. These spots often require immediate attention to prevent mold accumulation.
-
Upgrade Exhaust Fans: Install high-efficiency exhaust fans in key areas where moisture accumulates. Make sure these fans vent directly outside and not into attics or other indoor spaces, which could inadvertently promote mold growth.
-
Integrate Whole-House Systems: Consider the benefits of a whole-house ventilation system, such as an Energy Recovery Ventilator (ERV) or Heat Recovery Ventilator (HRV). These systems enhance airflow and help maintain peak humidity levels by balancing indoor and outdoor air.
-
Regular Maintenance: Regularly clean and maintain your ventilation systems to make certain they function efficiently. Blocked or dirty systems can hinder performance, reducing airflow and compromising your efforts in mold prevention.
Use Mold-Resistant Materials
Incorporating mold-resistant materials into your home’s construction and renovation can considerably mitigate future mold issues. As you rebuild or repair, consider using mold-resistant paints and installing effective moisture barriers. These choices aren’t merely practical; they’re investments in your home’s longevity and your family’s health.
Mold-resistant paints contain antimicrobial agents that prevent mold growth on painted surfaces. It’s wise to apply these paints in areas prone to dampness, such as bathrooms, kitchens, and basements. This proactive approach means you’re covering up a problem and preventing one from taking root.
Moisture barriers, on the other hand, are essential in areas like crawl spaces and around the foundation. These barriers block moisture from seeping into structural cavities where mold thrives.
Final Thoughts
As you commence on mold remediation after a flood, remember, the battle against mold is winnable with the right strategies. Start by swiftly eliminating water and drying out your fortress. Don’t just clean; attack every spore with professional-grade disinfectants. By repairing damage and sealing vulnerabilities, you turn your home into an impregnable bastion against future invasions. Embrace these steps, and your home won’t just survive; it’ll thrive, standing as a symbol of resilience and meticulous care.